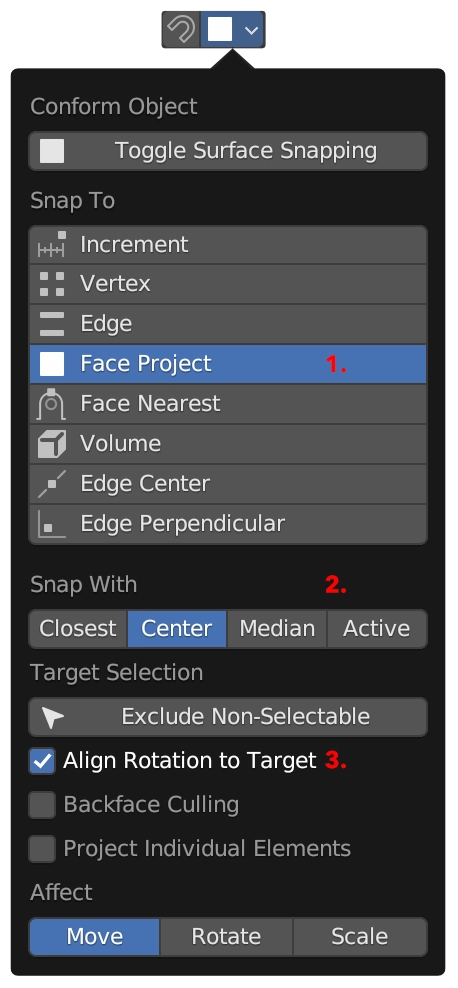
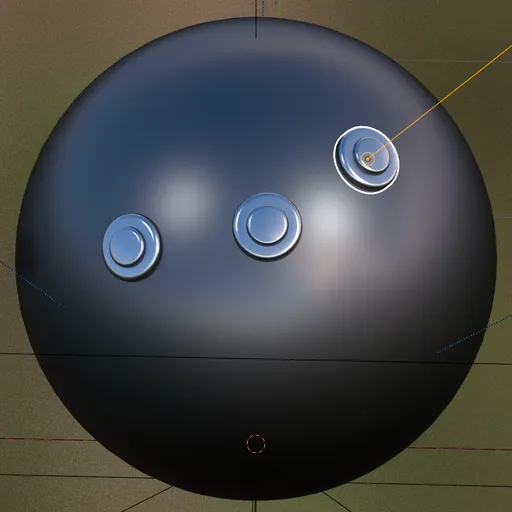
When adding mesh assets, for use as a cutter for example, it is important to align the asset to the underlying geometry’s surface normals. This can be achieved by using the following setting in the snap options menu in the tool bar at the top of the Blender UI.

This will snap the assets origin, as the center, to the surface of the target mesh, when using the CTRL key or by toggling the snapping option Magnet icon in the menu.
The surface normal of the target asset will show as an orange line as you move the asset.

Note: it is important that the origin of the asset is located at the place you wish the asset to meet the surface of the target mesh, to low and it will be above the surface and to high and the asset will be inside the target.
